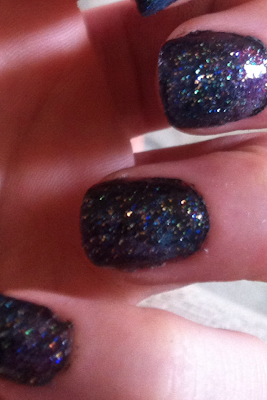
Sooo... I have been trying to find a new nail design and have FINALLY found one. Not only is it soo simple to do but looks amaaaazing!
All you need is a few nail polishes, an old make up sponge or cotton pads and obviously your nails!
The Nail Polishes I've used are a mixture from Topshop's own range to Barry M. You don't need as many as this you can get away with using just three of the colours but I want to show you the range of colours that can be used!
 |
| Barry M Nail effect in Black |
 |
| No 7 Stay Perfect Nail Colour in Totally Teal |
 |
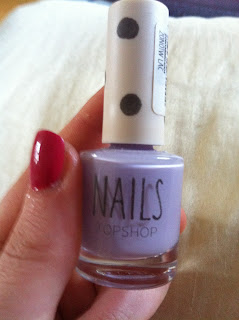
| Topshop Nail Polish in Parma Violet |
 |
| Topshop Nail Polish in Blitz |
 |
| Topshop Nail Polish in Cosmic Karma |
 |
| Stargazer Glitter Polish |
- Firstly use the Barry M nail effect polish on a clean nail, (this may seem odd but it allows the clear nail to come through for other colours to be put on top.) Wait for the first layer to dry then apply another layer this time dabbing it down with a corner of the sponge. It may at this stage look a bit messy but its ok! (Also instead of this point pre-painted black nails willl work just as well!)
- After the second layer has dried this is where you can choose which colours to use.. I used the teal colour at this stage.. but the Lilac colour (Topshop's Parma Violet) would work just as well! Taking the sponge lightly dab the colour onto one corner, then start to fill in any gaps on your nail dabbing over the nail with the sponge. Do this to all nails and wait to dry.
- Next taking a shimmery colour, I used both 'Blitz' and 'Cosmic Karma'(Topshop nail polishes are great for these types of colours and range from £5 to £7 making them an even better investment!) do the same as step two. Less is certainly more with this nail art, try not to add too much product to the sponge as you can always repeat over the colours.
- I tried to alternate the colours, for instance on one finger adding the pink colour at the top of the nail and the bluey colour near the nail bed and blending it all together.
- After the nail has dried you'll be able to see a pattern forming.. looking a bit like the GALAXY-hence the name! Finally add the translucent glitter polish and hey presto you have your own solar system on your nails! A top coat is optional I found that the glitter polish worked just as well!
The colour has lasted over a week without any chipping and I have had loads of compliments! In the day time it looks so pretty and glittery without looking too over the top, and can be worn on nights out too which makes it a perfect nail art pattern to choose! Although it may seem complicated with the different colours and sponges etc I can honestly say its not as scary as it looks I am no nail art professional and was extremely pleased with the results!
Try it out for yourself!


the nails look amazing! love it!
ReplyDeleteThanks, glad you liked!
DeleteThats really nice im really into nail art of late and luv me a bit of sparkle. Really cute blog xx
ReplyDelete